


Introduction: Your First Step into API Testing
What Is an API?
In development, you’ll often hear about APIs (Application Programming Interfaces) — but what are they, really? And how do you know if an API (one you use or build) actually works?
The Waiter Analogy
Imagine you’re at a restaurant:
- You (the client) don’t wander into the kitchen (the server) to cook your meal.
- Instead, you tell a waiter what you’d like (your request).
- The waiter delivers your request to the kitchen.
- Later, the waiter brings you your meal (the response) — whether it’s soup, steak, or dessert.
In this analogy:
- The kitchen is your server or backend logic.
- The waiter is the API.
- Your order is the request you send (GET, POST, etc.).
- The delivered food is the response (the data or result).
Real API Example
In real-world programming:
- You write a request (e.g. HTTP GET, POST, PATCH, DELETE) specifying a URL, headers, body, etc.
- The server processes that request, interacts with databases or services, and returns a response (usually JSON or XML data, plus status codes).
- A well functioning API will give you predictable, meaningful responses (e.g., 200 OK, 404 Not Found, or data like { "id": 123, "name": "Alice" }).
Why Use Thunder Client?
Many developers rely on tools like Postman for API testing, but since it’s a standalone application, you often need to switch away from your code, open another window, and break your flow. Thunder Client, on the other hand, is a lightweight and native VS Code extension that lets you test APIs without ever leaving your editor. It’s fast, free, and seamlessly integrated, helping you stay focused and productive while sending requests and reviewing responses—all within your development environment.
Phase 1: Setup and Installation (The Foundation)
Getting started with Thunder Client is the easiest part.
Prerequisites Checklist
- You must have Visual Studio Code (VS Code) installed.
- You need an internet connection for the installation and our practice requests.
Step-by-Step Installation Guide
Follow these three quick steps to get set up:
- Open the Extensions View
- Search and Find Thunder Client
- Install the Extension
- Launch and Explore the Interface
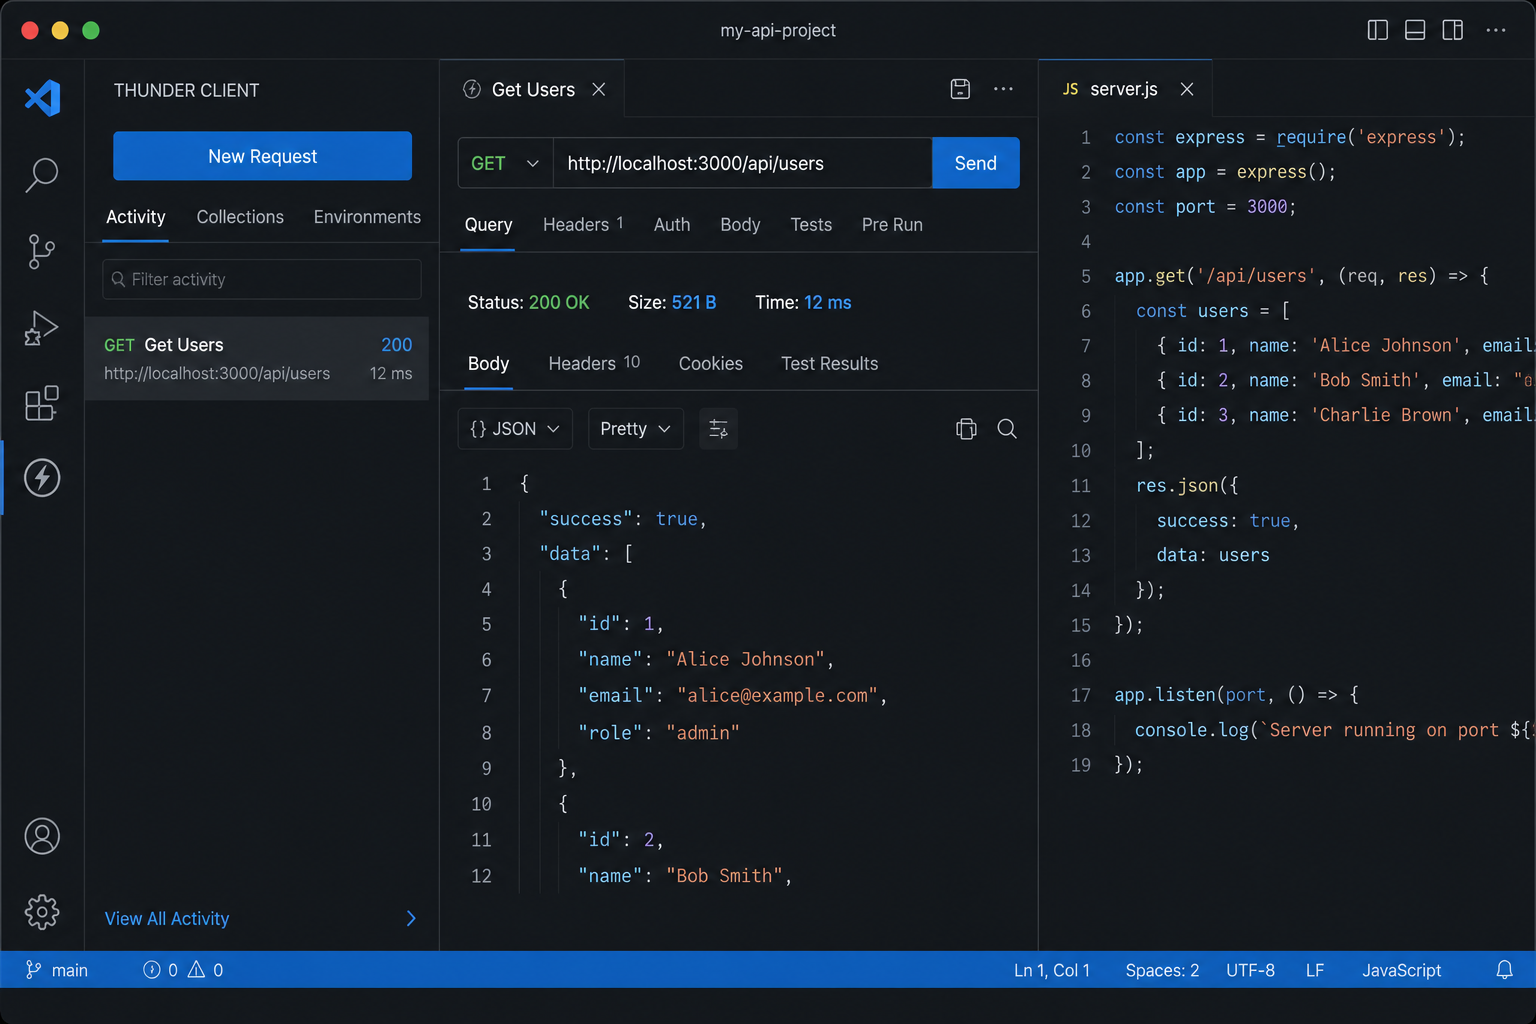
i. Request Configuration Area (Top Center)
This is where the user defines what they want to do.
- HTTP Method: The dropdown menu (GET) used to select the action (GET, POST, PATCH, DELETE, etc.).
- URL Input: The field where the API endpoint URL (https://www.thunderclient.com/welcome) is entered.
- Request Tabs: The tabs (Query, Headers, Auth, Body, Tests) used to add parameters, authorization tokens, or data payloads to the request.
- Send Button: The button (Send) used to execute the API call.
ii. Activity and Organization Panel (Left Sidebar)
This panel helps users manage and organize their work.
- Activity: (Currently selected) Shows a history of all recent requests made, allowing the user to quickly reload and re-run them.
- Collections: Used to save and organize related API requests into logical folders for projects.
- Env (Environments): Used to define and manage variables (like base URLs or API keys) for different testing environments (e.g., development, staging).
iii. Response Output Area (Bottom Center)
This is where the user sees the result of the API call.
- Status Code: Shows the numerical result of the request (Status: 200 OK), indicating success or failure.
- Response Details: Displays the size (429 Bytes) and time (2.07 s) it took for the API to respond.
- Response Body: The main area where the actual data returned by the API is displayed (the JSON code block).
Phase 2: Mastering the Core API Actions
Hands-On Tutorial: CRUD with DummyJSON
We will use the DummyJSON public API, which allows us to practice all four major API operations (CRUD: Create, Read, Update, Delete) against its /posts endpoint.
Base URL for Practice: https://dummyjson.com/posts
1. READ Operation: Listing and Viewing Posts (GET)
The GET request is the fundamental operation used to retrieve existing data from the API.
Goal: List All Posts
- Request Method: Set the dropdown to GET.
- URL: Enter the base resource endpoint: https://dummyjson.com/posts
- Action: Click the Send button.
- Expected Result: You should receive a Status: 200 OK. The response body will contain a single JSON object that holds an array of all available posts.
Goal: Read a Single Post
To view just one item, you add the item's ID to the end of the URL.
- Request Method: Set the dropdown to GET.
- URL: Enter the specific post ID: https://dummyjson.com/posts/1
- Action: Click the Send button.
- Expected Result: You should receive a Status: 200 OK. The response body will contain only the JSON object for the post with ID 1.
2. CREATE Operation: Adding a New Post (POST)
The POST request is used to send new data to the API to create a brand new resource.
Goal: Create New Post
- Request Method: Set the dropdown to POST.
- URL: Enter the specific endpoint for creation: https://dummyjson.com/posts/add
- Request Body: Navigate to the Body tab and input the JSON data (the payload) you want to send.
- Action: Click the Send button.
- Expected Result: You should receive a Status: 200 OK (This is DummyJSON's way of signaling a successful creation). The Response Body will show the data you sent, along with a new, unique id assigned by the API.
3. UPDATE Operation: Modifying an Existing Post (PATCH)
The PATCH request is used to update only specific fields of an existing resource without replacing the entire object. We will update the title of post ID 1.
Goal: Update Post Title
- Request Method: Set the dropdown to PATCH.
- URL: Enter the specific post ID you want to update: https://dummyjson.com/posts/1
- Request Body: Navigate to the Body tab and input the JSON data containing only the field you want to change.
- Action: Click the Send button.
- Expected Result: You should receive a Status: 200 OK. The Response Body will return the full post object, confirming that the title field has been successfully updated.
4. DELETE Operation: Removing a Post (DELETE)
The DELETE request is used to permanently remove a resource from the server. We will delete the post with ID 1.
Goal: Delete Post ID 1
- Request Method: Set the dropdown to DELETE.
- URL: Enter the specific post ID you want to remove: https://dummyjson.com/posts/1
- Request Body: The body tab should be left empty (no data is sent when deleting a resource).
- Action: Click the Send button.
- Expected Result: You should receive a Status: 200 OK. The Response Body will return the deleted post object, but with an added field: "isDeleted": true, which confirms the item's removal.
Phase 3: Beyond the Basics (Free Productivity Features)
1. The Safety Net: History/Activity
- What it is: Every single request you send (GET, POST, PATCH, DELETE) is automatically logged in the Activity tab in the left sidebar.
- Why it's great: Think of it as an infinite undo button. If you ever lose a request or need to quickly re-run a call from an hour ago, it's always there waiting for you. Click on any item in the history to instantly reload its full context.
- How to Rename a Request: By default, requests are named by the method and URL. To make your history readable:
- Go to the Activity tab.
- Right-click on the request you want to rename (e.g., POST https://dummyjson.com/posts/add).
- Select "Rename Request" and type a descriptive name, like "Create New Blog Post."
2. Organizing with Environments (Variables)
- What it is: The Env (Environments) tab lets you define variables (like a base URL or an API key) so you don't have to type them repeatedly.
- Why it's great: Imagine your development API is at https://dummyjson.com and your production API is at https://myapp.com. Instead of changing 50 different requests, you define a single {{baseURL}} variable and update it only once when you switch environments.
Comparison: Thunder Client vs. Postman
As you grow, you will hear about Postman. While Postman is a powerful tool for large teams and complex workflows, Thunder Client is often superior for beginners and everyday development tasks.
Here is why Thunder Client is the ideal starter tool :


.png)
